Custom Actions
They allow you to send any commands to the server, these can be both standard console commands of the game itself (for example, killplayer), and commands from plugins installed on the server, for example, mutes in your chat system.
First action
To understand how this system works, let’s start with the simplest and most basic action — killing a player.
- Go to the Actions section.
- Click the
Create a new actionbutton.

- In the opened menu, you'll see input fields and options. Here's what each of them means:
| Option | Description |
|---|---|
| Name | The name of the action. It will appear in the player’s context menu. |
| Group | The group this action belongs to. For example, if the action is related to Oxide commands, you might name the group Oxide. |
| Access level | Determines who can use this action. If a moderator doesn’t have access to the specified level, they won’t be able to execute it. |
| Allow for offline players | Enables the action to be used on a player who is currently offline. |
| Select a server before execution | Enable this if the action should be executed on a different server than the one the player is/was on. |
| Confirm before execution | Helps prevent accidental execution by requiring confirmation before the action is carried out. |
- Set the name to
Kill, the group toOther, assign the desired access level, enable the option to use it on offline players, and click [Next]. - On the next step, enter the command (or multiple commands). In this case, use:
killplayer {steam_id}and click [Complete].

- That’s it — you’ve created your first action. Now you can right-click on your own profile (or open the profile and click the three-dot button) → Actions → Other → Kill.

If everything was configured correctly, your character will die.
Your variables
If standard variables like steam_id and steam_name automatically insert values for the selected player, there are cases when you may need to specify custom values manually. For such situations, you can define your own variables.
Example of such an action
- Create a new action.
- You can choose any name, group, and access level.
- Set Command #1:
o.usergroup add {steam_id} {group_name}- Set Command #2:
Player {steam_name} has been granted the {group_name} group as a gift from the admin team for {gift_reason}!- Save the action and execute it on yourself.

Now, instead of running immediately, the action will prompt you to enter values for {group_name} and {gift_reason}. As you type, you’ll see how the final command updates in real time.
Predefined Variable Values
Actions support predefined values for variables — this is especially useful when you need to restrict the selection to specific options. For example, when creating an action with the {group_name} variable, you can define a list of allowed groups that will appear in a dropdown menu during execution. This way, moderators don’t have to remember all possible values manually, and it also prevents assigning dangerous groups like admin.
To set this up, simply list all allowed options directly in the variable:
{group_name:vip/premium/god}Now, when executing the action, we’ll be able to select one of these three groups:

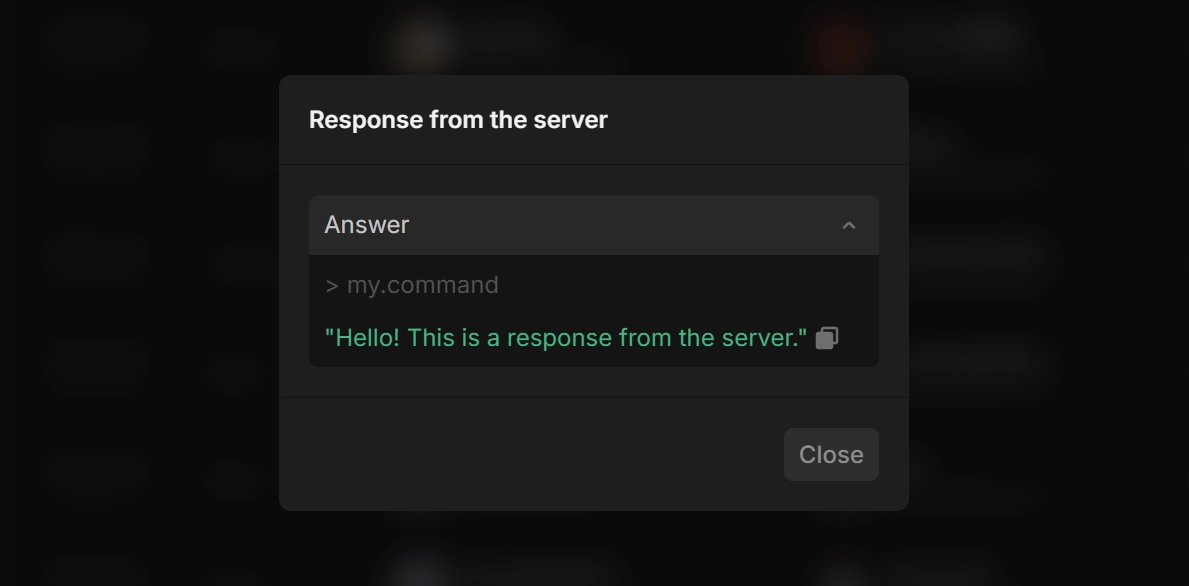
Response from Server
The system supports receiving server responses after executing a custom command. To implement response support in your own command, use the args.ReplyWithObject or args.ReplyWith methods.
// Example command with response

[ConsoleCommand("my.command")]
private void MyCommand(ConsoleSystem.Arg arg)
{
    arg.ReplyWith("Hello! This is a response from the server.");
    return;
}
WARNING
Please note that not all standard in-game console commands return a response.